What You Will Learn
This tutorial walks you through every step of using Chrome tab groups, from creating your first group to managing a multi-group workflow. No prior experience required. By the end, you will be comfortable creating, naming, coloring, collapsing, rearranging, and saving tab groups.
Tab groups are available in Chrome version 83 and later. Since Chrome updates automatically, you almost certainly have access to this feature already. You can check your Chrome version by typing chrome://settings/help in the address bar.
Step 1: Create Your First Tab Group
Let us start with the basics. Open Chrome and make sure you have at least one tab open.
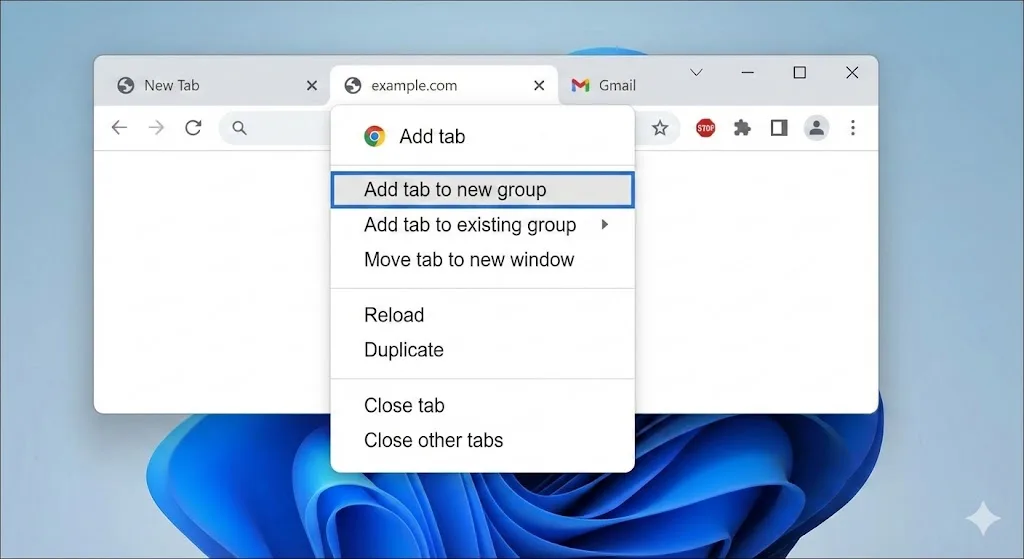
- Right-click the tab you want to group. A context menu appears.
- Click "Add tab to a new group."
- A small colored circle appears to the left of the tab. This is your new group.
That is it. You have created a tab group. The tab now has a colored underline and a small dot indicating it belongs to a group.
Step 2: Name and Color Your Group
A group without a name is hard to identify. Here is how to fix that:
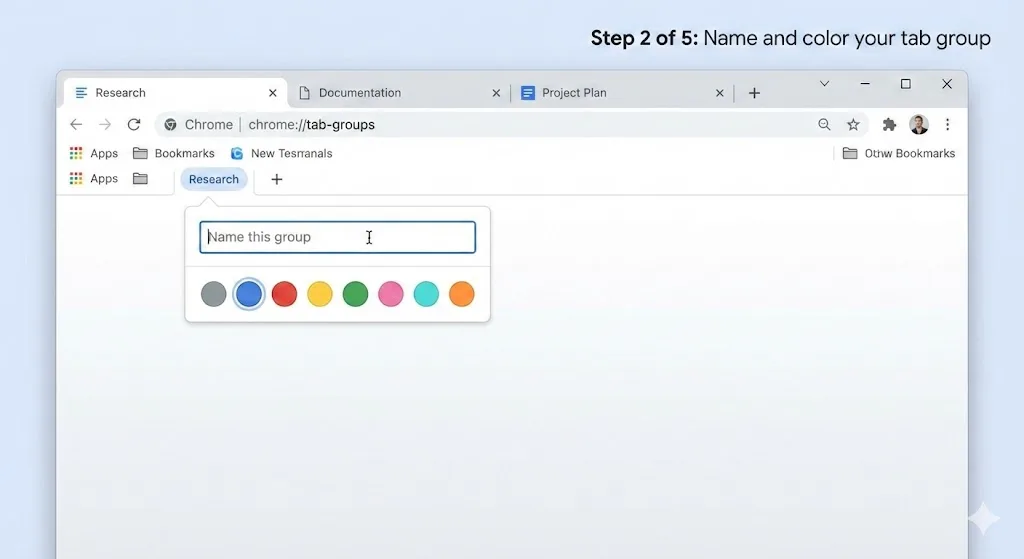
- Click the colored dot (or group label) to the left of the grouped tab.
- A small popup appears with a text field and color options.
- Type a short name like "Work" or "Research."
- Click one of the eight color circles to choose a color.
- Click anywhere outside the popup to close it.
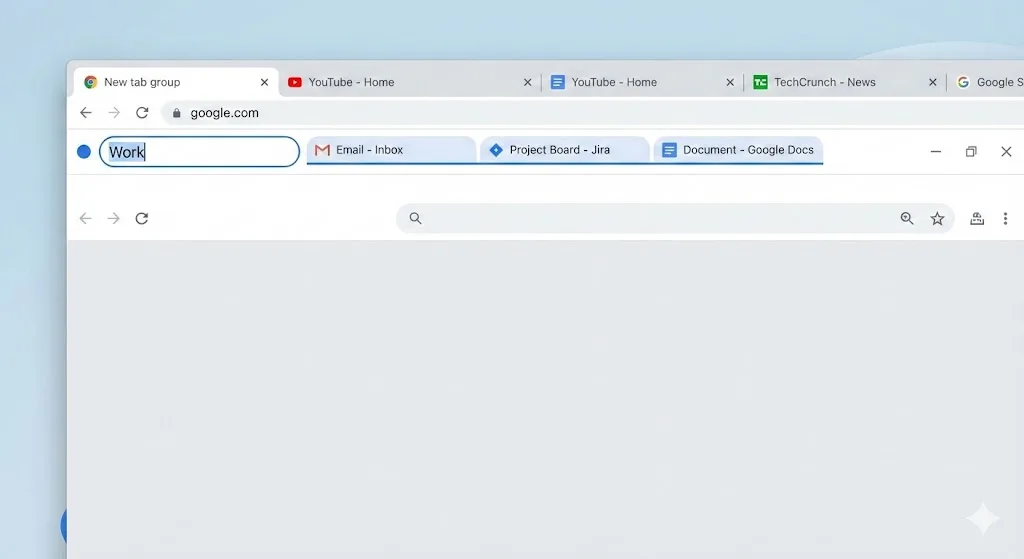
Your group now has a named, colored label on the tab bar. Keep names short, ideally one or two words, since the label needs to fit in the tab bar alongside all your other tabs and groups.
Naming Tip
Use consistent, short names. Instead of "Research for Q2 Marketing Campaign," just use "Q2 Research." The shorter the name, the more groups you can fit in your tab bar.
Step 3: Add More Tabs to the Group
A group with one tab is not very useful. Here are three ways to add more tabs:
Method A: Right-Click
- Right-click the tab you want to add.
- Hover over "Add tab to group."
- Click the name of the group you want to add it to.
Method B: Drag and Drop
- Click and hold the tab you want to add.
- Drag it over the group label or between tabs that are already in the group.
- Release the mouse button. The tab is now part of the group.
Method C: Group Multiple Tabs at Once
- Hold Ctrl (or Cmd on Mac) and click each tab you want to select.
- Right-click one of the selected tabs.
- Click "Add tabs to a new group" or add them to an existing group.
Method C is the fastest way to organize a messy tab bar. You can select ten tabs at once and group them all in a single action.
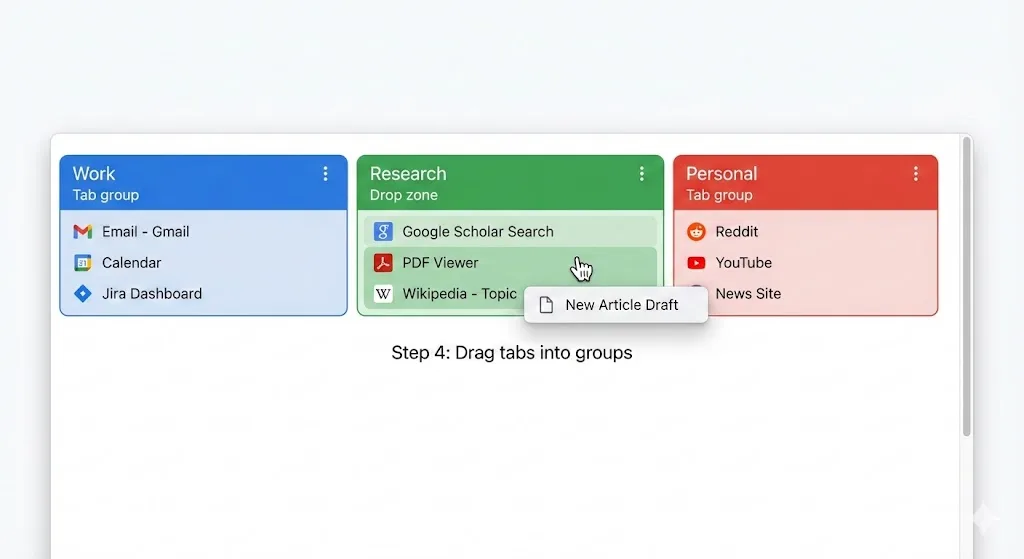
Step 4: Collapse and Expand Groups
Collapsing is the feature that makes tab groups truly powerful. When you collapse a group, all the tabs inside it disappear from view, leaving just the group label visible. The tabs are still loaded and accessible, but they do not take up space on your tab bar.
- Click the group label (the colored text on the tab bar).
- The group collapses, and all its tabs are hidden.
- Click the label again to expand the group and show its tabs.
This is incredibly useful when you have multiple projects going at once. Collapse everything except the project you are currently working on. Your tab bar stays clean, and switching between projects is a single click.
Step 5: Move and Rearrange Tabs
As your work evolves, you will need to move tabs between groups or rearrange the order of your groups.
Move a Tab to a Different Group
- Right-click the tab.
- Hover over "Add tab to group."
- Select the destination group. The tab moves automatically.
Remove a Tab from a Group
- Right-click the tab.
- Click "Remove from group."
- The tab becomes a standalone tab outside any group.
Rearrange Groups
- Click and hold the group label.
- Drag it left or right on the tab bar.
- Release to place the entire group in its new position.
Step 6: Ungroup or Close a Group
When you are done with a group, you have two options:
Ungroup (Keep Tabs Open)
- Right-click the group label.
- Click "Ungroup."
- The tabs remain open but are no longer grouped. The label and color disappear.
Close Group (Close All Tabs)
- Right-click the group label.
- Click "Close group."
- All tabs in the group are closed. Be careful with this one; make sure you do not need those tabs before closing.
Be Careful
"Close group" closes all tabs in the group immediately. If you had unsaved work in any of those tabs (like a form you were filling out), it will be lost. Consider saving your group first.
Step 7: Save Your Tab Groups
By default, tab groups disappear when you close Chrome. If you want to keep your groups for next time, you need to save them.
Using Chrome's Built-In Save
- Right-click the group label.
- Click "Save group."
- The group is saved and appears on your bookmarks bar.
This works for basic needs, but Chrome's save feature can lose groups after updates or crashes. For more reliable saving, consider an extension. Our guide on how to save tab groups in Chrome covers all your options in detail.
TabGroup Vault: Save Groups Reliably
TabGroup Vault takes full snapshots of all your tab groups with one click. Unlike Chrome's built-in save, snapshots are stored independently and survive crashes and updates. You can also keep multiple versions, so you can go back to how your groups looked yesterday or last week. Free tier includes 5 snapshots; Pro is $29 one-time.
Step 8: Use Tab Groups in Your Daily Routine
Now that you know the mechanics, here is how to incorporate tab groups into a practical daily workflow:
Morning Setup
When you start work, create a group for your primary task. If you saved groups from the day before, restore them. Open the tabs you need and add them to the appropriate group.
During the Day
As you open new tabs, immediately add them to the relevant group. This prevents your tab bar from getting cluttered. When you switch tasks, collapse the group you are leaving and expand the one you are moving to.
End of Day
Before closing Chrome, save any groups you want to continue working on tomorrow. Close any groups that are finished. This gives you a clean start the next morning.
Practice Exercise
Try this quick exercise to build your tab group skills:
- Open Chrome and navigate to five different websites (any sites you like).
- Group the first three tabs into a group called "Work" with a blue color.
- Group the other two tabs into a group called "Personal" with a green color.
- Collapse the "Personal" group.
- Open a new tab and add it to the "Work" group by dragging it.
- Move one tab from "Work" to "Personal" using the right-click method.
- Right-click the "Work" group label and save it.
If you completed all seven steps, you now know everything you need to use tab groups effectively every day.
Common Questions from Beginners
Can I have a tab in two groups at once?
No. Each tab can belong to only one group at a time. If you need the same page in two groups, open it in a second tab and add each tab to a different group.
Do collapsed groups still use memory?
Yes. Collapsing a group hides the tabs visually but does not unload them from memory. Chrome's Memory Saver feature may automatically unload inactive tabs to save RAM, but this is a separate feature from tab groups.
What happens if I have no groups and want to group all my existing tabs?
Select all tabs by pressing Ctrl+A (or Cmd+A on Mac) while focused on the tab bar, then right-click and create a new group. Alternatively, select a subset of tabs with Ctrl+click and group those first, then repeat for the remaining tabs.
For a comprehensive overview of all tab group features, read our complete guide to Chrome tab groups. If you want to learn keyboard shortcuts to speed up your workflow, check out the Chrome tab groups keyboard shortcuts cheat sheet.